

User Guide
Manage your agents, databases, channels and backup policies on a daily basis.
Understanding the Architecture
Portabase runs as two separately deployed components.
The Dashboard centralizes configuration: agents, databases, backup schedules, retention, alerts and storage channels.
The Agent is a Rust binary installed on the same network as your databases. It is responsible for:
- connecting to the databases you declare (from the dashboard or in its local configuration)
- executing backups according to the defined schedule
- sending backup files to your storage destinations
- reporting logs and status back to the dashboard
The dashboard never connects directly to your databases. Everything goes through the agent. This architecture lets you protect databases on a private network or behind a firewall without exposing your servers.
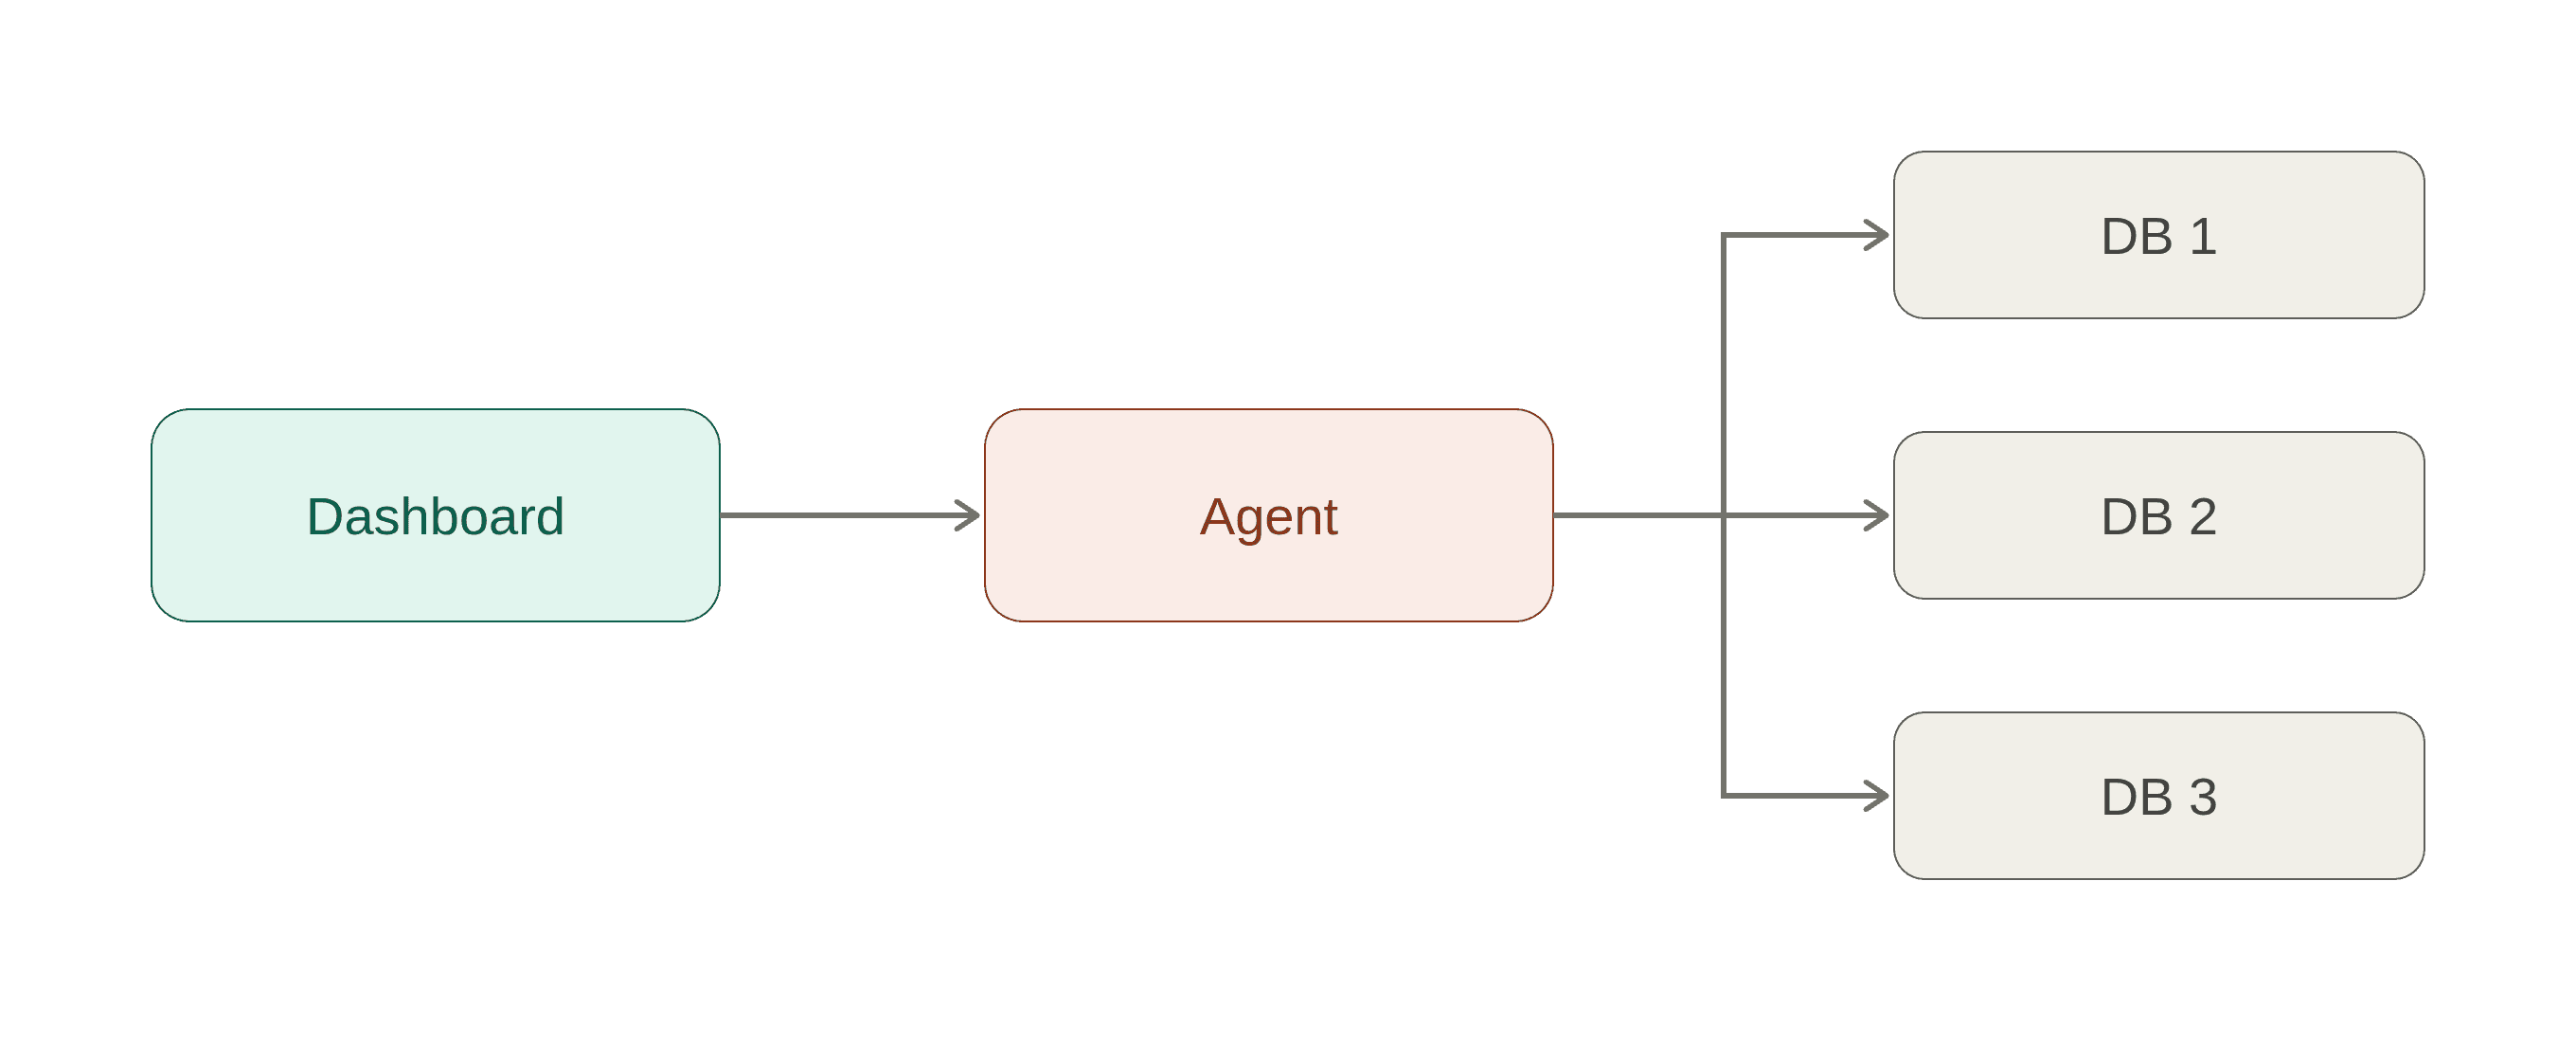
The agent regularly sends a ping to the dashboard. This ping transmits the list of the agent's databases, agent status and operation results. In return, the dashboard sends instructions (database configurations, schedules, restore orders, etc.).
Entity Hierarchy
Organisation
├── Agents
│   └── Databases (added from the dashboard or declared on the agent)
│       ├── Project assignment (optional)
│       ├── Backup policy (cron)
│       ├── Retention policy
│       ├── Alert policies  ──→  Notification channels
│       └── Storage policies ──→ Storage channels
├── Projects (logical grouping)
├── Notification channels
└── Storage channels
Managing Agents
An agent represents one instance of the Portabase Agent program deployed on a server. A single agent can manage multiple databases on the same server. If you have databases on multiple servers, create one agent per server.
Creating an Agent
Prerequisite: you must be owner or admin of the organisation.
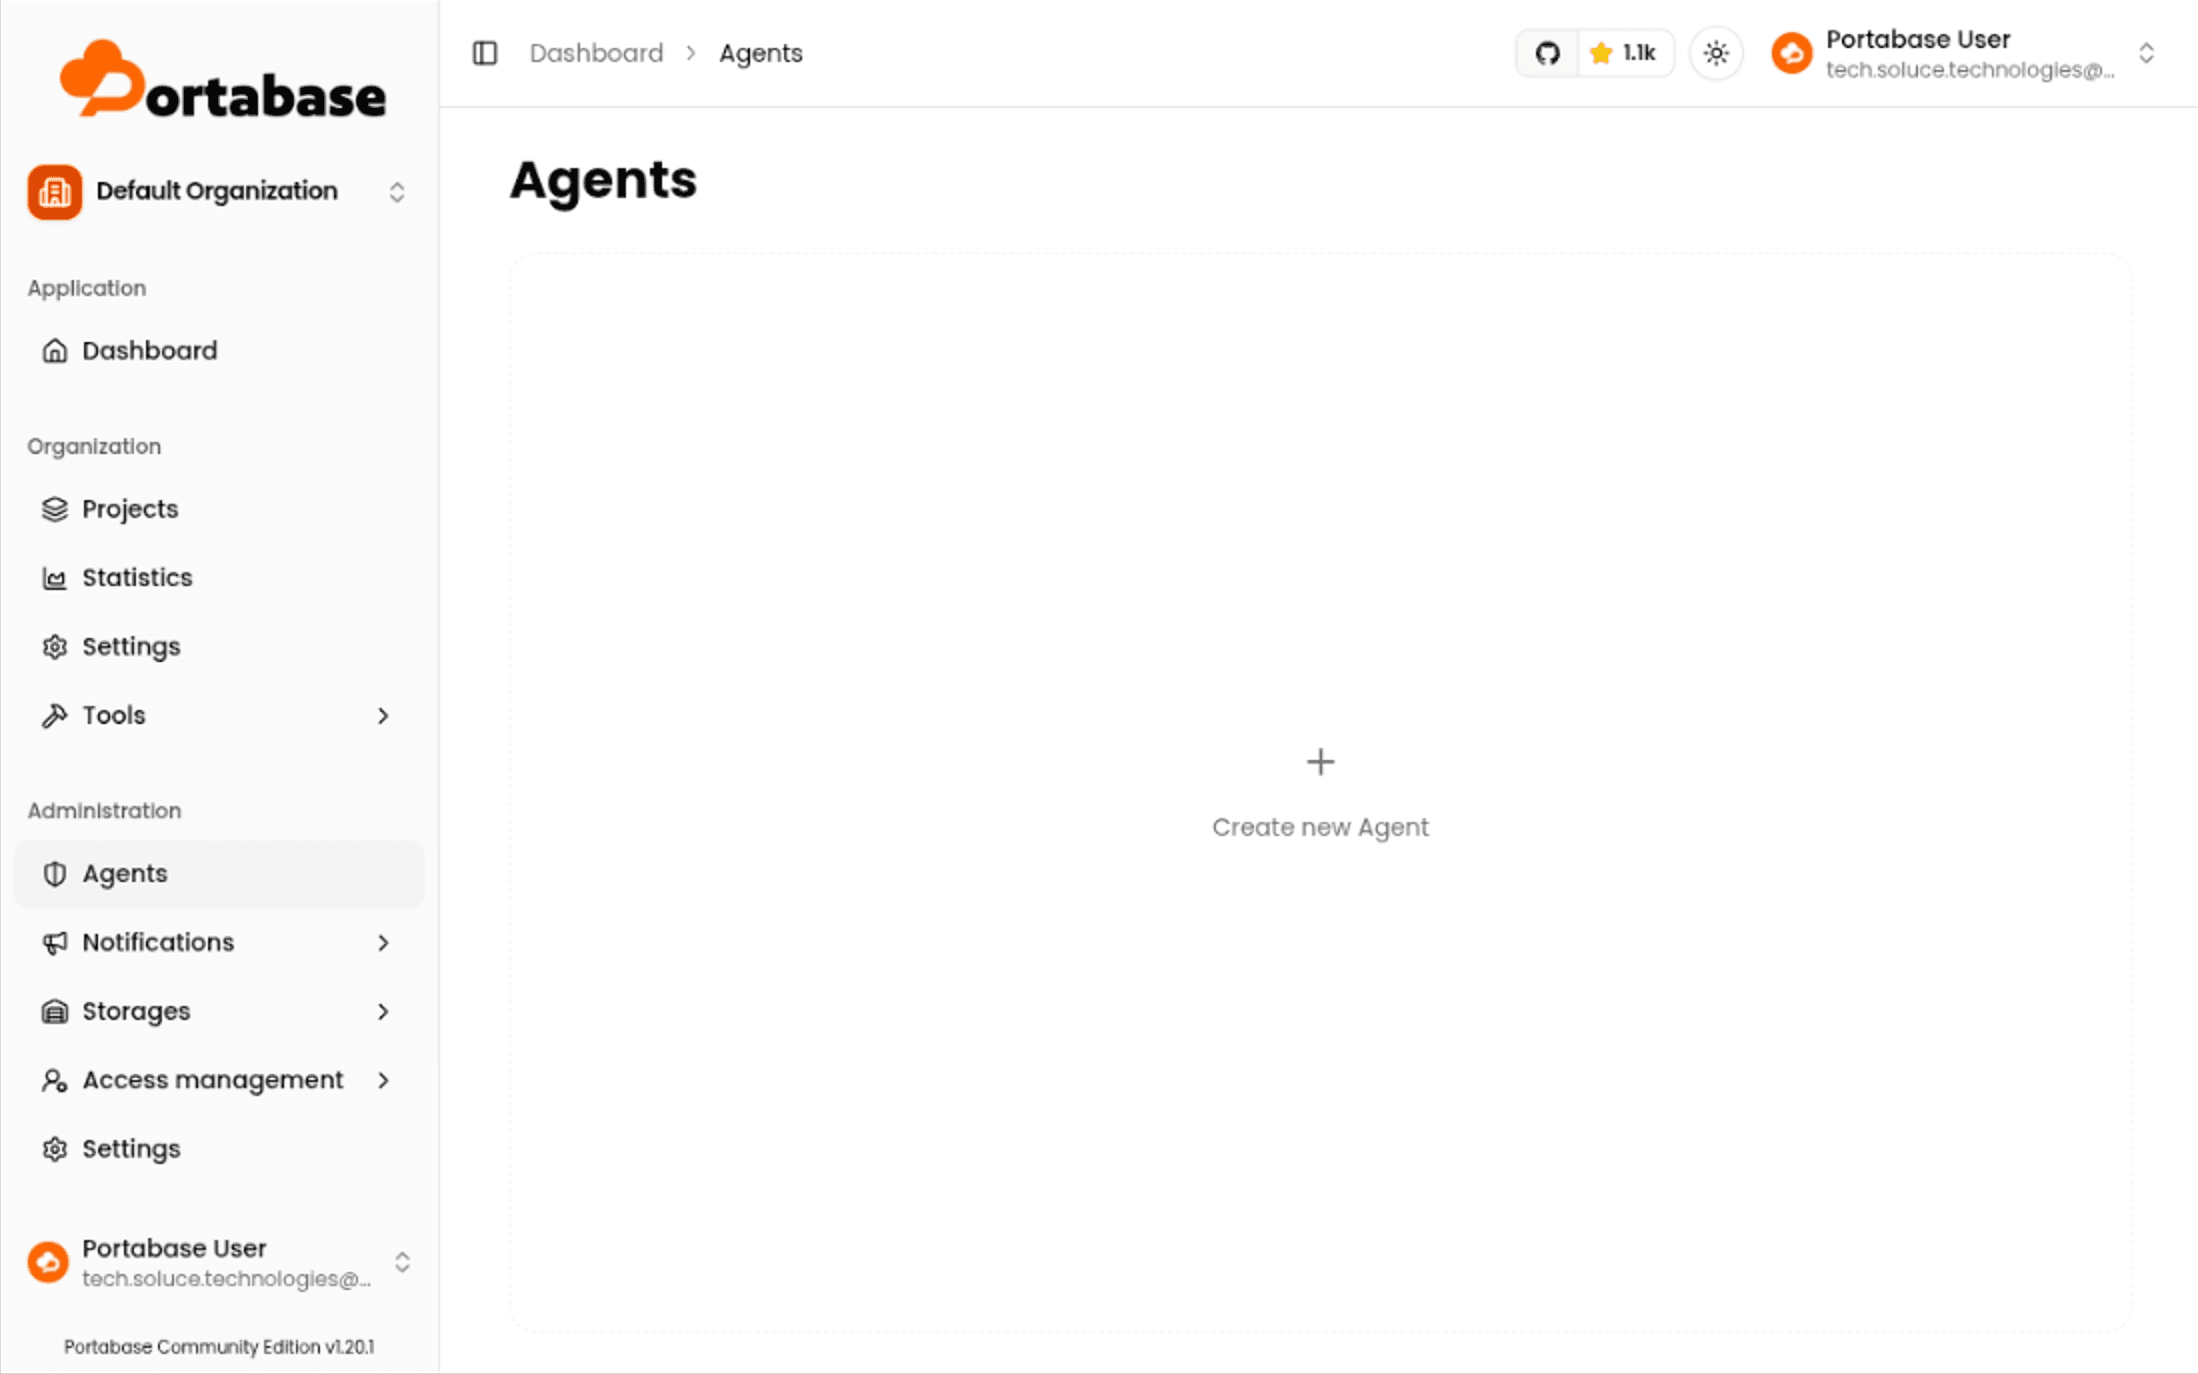
Go to Organisation > Settings > Agents and click Add agent.
Fill in the fields:
- Name - human-readable identifier (e.g.
Production Server EU,Dev Machine) - Description - free notes about this agent's role
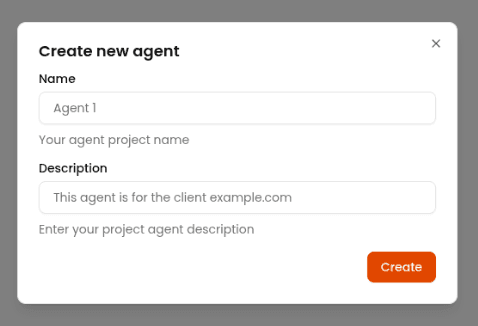
Confirm. The agent is created and an Edge Key is generated automatically.
Copy the Edge Key from the agent detail page (button Show Key), then paste it into the Portabase Agent Rust configuration on your server.
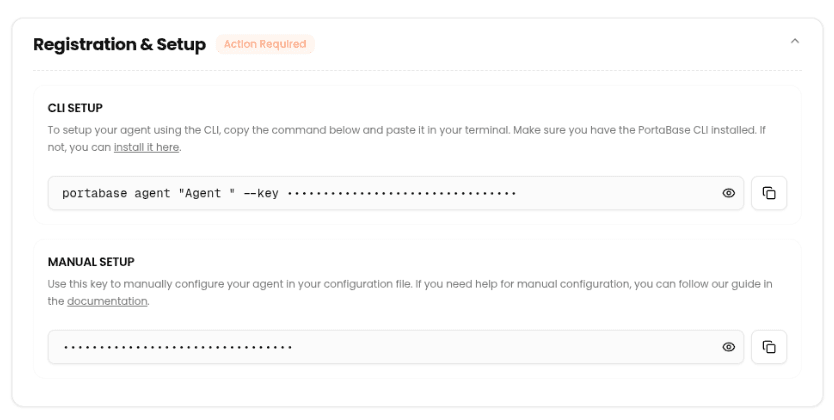
Verifying the Connection
On next startup, the agent pings the dashboard. You'll know it's connected when:
- the Last Contact column shows a recent timestamp
- the status turns green in the interface
Databases declared in the agent's local configuration (CLI or databases.json) appear automatically from the first ping. You can also add databases directly from the dashboard - see Adding a Database.
Monitoring Agent Health
From the agent detail page, the Health tab shows a 12-hour ping history as a grid. Each cell represents one ping: green if received, red if missed.

Adding a Database
A database can be declared in three ways. They can be combined on the same agent.
| Method | When to use it |
|---|---|
| Dashboard (recommended) | Add and edit databases from the interface, without touching any file on the server. |
CLI (portabase agent db add) | You install your agents with the CLI, or want it to create a test database container. |
Configuration file (databases.json / .toml) | Automation (Ansible, Terraform, GitOps) or hand-edited files. |
From the Dashboard
Prerequisites: you must be owner or admin of the organisation, with
Dashboard 1.29.0+ and Agent 1.19.0+. The agent must have connected at
least once: until then, its version is unknown and the Add database
button stays disabled.
Open the agent detail page (Organisation > Settings > Agents > [agent]).
In the Managed Databases section, click Add database.
In the Form tab, enter a name, choose the type, then fill in the connection settings (host, port, credentials…). The fields are the same as in the engine pages.
You can also paste an existing databases.json entry into the JSON tab: both tabs stay in sync.
Confirm. The configuration is sent to the agent on its next ping, and the database can then be configured like any other.
Each database card on the agent page also has a Configure button to edit its settings. On a database declared in the agent's databases.json, saving a configuration from the dashboard overrides it: for the same database (same generated_id), the dashboard values take precedence over the local file.
Some engines still need a mount in the agent container: the database file for SQLite, the Docker socket for Docker volumes, the backed-up directory for Files.
From the Agent (CLI or File)
Databases declared on the agent side appear automatically in the dashboard on the next ping:
- CLI:
portabase agent db add - Configuration file:
databases.jsonordatabases.tomlmounted in the agent container - see Configuration File
A Database Doesn't Appear?
Check that:
- the agent is connected (green status, recent Last Contact)
- the agent runs version 1.19.0 or later, for a database added from the dashboard
- the database is accessible from the agent's server
Organising Databases with Projects
A project is a logical folder for grouping databases. It has no effect on backup execution - it is purely an organisational tool.
Typical uses: group all databases for an application, separate production from staging, organise by team or client.
Creating a Project
Prerequisite: you must be owner or admin of the organisation.
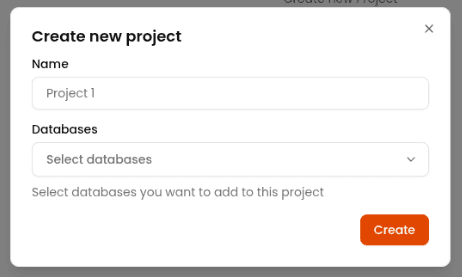
- Go to Organisation > Projects
- Click New project
- Give the project a name, choose databases and confirm
Configuring a Database
Configuration Tabs
From the database detail page (Projects > [project] > [database]):
| Tab | Content |
|---|---|
| Overview | KPIs, status, general information |
| Backups | Backup list, manual actions |
| Restore | Available restore operations |
| Schedule | Cron schedule + retention |
| Alerts | Alert policies |
| Storage | Storage policies |
| Logs | Detailed operation logs |

Triggering a Manual Backup
From the Backups tab, click Backup now. The backup moves to waiting status, then ongoing as soon as the agent picks it up at the next ping.
| Status | Meaning |
|---|---|
waiting | Waiting to be picked up by the agent |
ongoing | Currently running |
success | Completed successfully |
failed | Failed - check the Logs tab for details |
Importing an External Backup
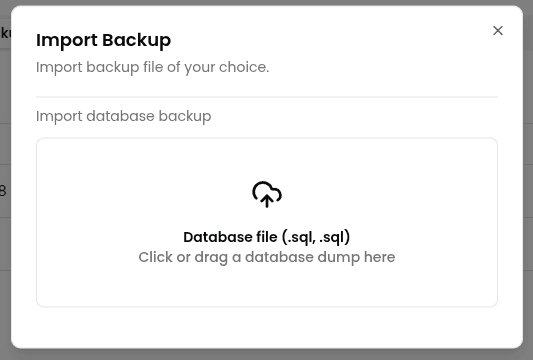
- From the Backups tab, click Import
- Drag and drop your file or browse your filesystem
Restoring a Database
Restoration overwrites the current data in the target database. Make sure you have a recent backup before restoring. Restore is not available for Redis and Valkey.
From the Restore tab, two options:
- From an existing backup - choose a backup from the list and click Restore
- From external storage - select a file available in one of your storage channels
Configuring Channels
Channels are connectors to external services, used in two contexts: notifications and storage. They are configured at the organisation level and can be reused across multiple databases.
Creating a channel:
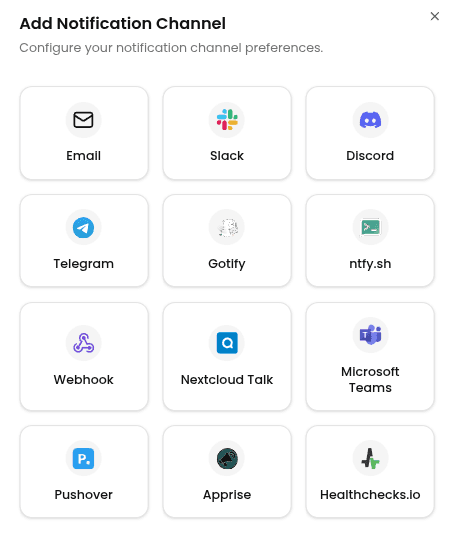
- Organisation > Notifications > Channels > Add channel
- Choose the provider
- Fill in the connection details
- Give the channel a recognisable name (e.g.
Slack #ops-alerts) - Test with the Test button
- Enable the channel
A disabled channel receives no notifications even if alert policies point to it. Use this flag to temporarily silence a channel without losing its configuration.
Setting Up Policies
Policies are configured at the database level. A database can have multiple policies of different types.
Backup Schedule (cron)
Where to configure: database detail page > Schedule tab
The schedule is a cron expression that defines when automatic backups run.
┌──────── minute (0–59)
│  ┌───── hour (0–23)
│  │  ┌── day of month (1–31)
│  │  │  ┌─ month (1–12)
│  │  │  │  ┌ day of week (0–7, 0 and 7 = Sunday)
│  │  │  │  │
* * * * *| Expression | Result |
|---|---|
0 2 * * * | Every day at 2 AM |
0 */6 * * * | Every 6 hours |
0 2 * * 1 | Every Monday at 2 AM |
0 2 1 * * | 1st of every month at 2 AM |
Need help building an expression? Use crontab.guru.
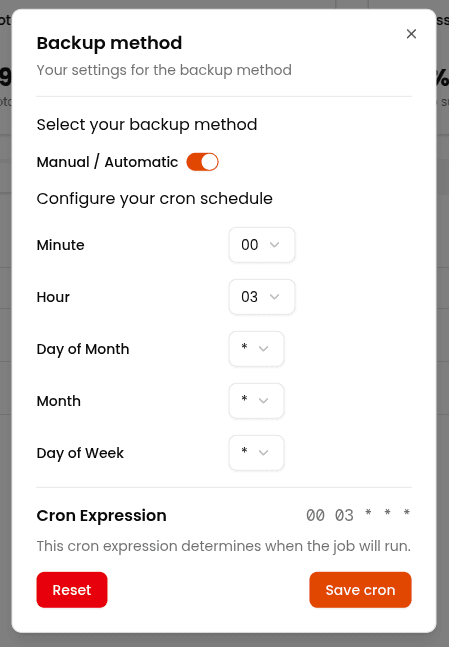
To disable automatic backups, switch to Manual mode. You can still trigger backups manually from the Backup now button.
Deleting the schedule also deletes the associated retention policy. If you add a schedule later, you will need to reconfigure retention.
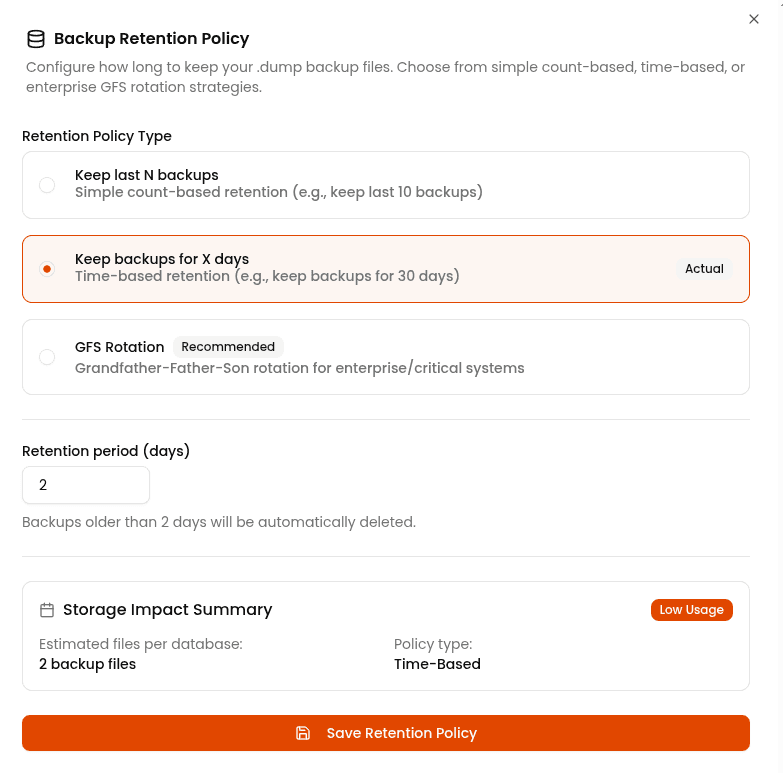
Retention Policy
Where to configure: database detail page > Schedule tab > Retention section
Prerequisite: an active cron schedule must exist on the database.
Keeps only the N most recent backups. Older backups are deleted as new ones are created.
| Parameter | Min | Max | Default |
|---|---|---|---|
| Number of backups | 1 | 100 | 7 |
Ideal for development databases or when disk space is limited.
There can only be one retention policy per database. Creating a new one automatically replaces the existing one.
Alert Policies
Where to configure: database detail page > Alerts tab
Prerequisite: at least one notification channel must be configured and enabled.
| Event | When is it triggered? |
|---|---|
error_backup | A backup fails |
success_backup | A backup completes successfully |
error_restore | A restore fails |
success_restore | A restore completes successfully |
error_health_database | The agent reports the database is no longer accessible |
The weekly_report event is not yet implemented. Want to help? See the
Contributing guide.
Creating a policy:
- Alerts tab > Add policy
- Select the target notification channel
- Check the events to monitor
- Enable and save
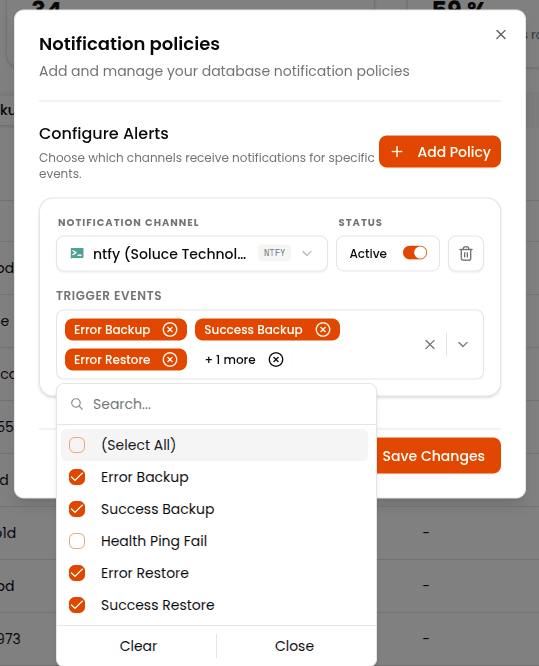
You can create multiple policies on the same database, for example, Slack for errors and SMTP for successes. Each policy can be individually disabled without deleting it.
Storage Policies
Where to configure: database detail page > Storage tab
Prerequisite: at least one storage channel must be configured and enabled.
Creating a policy:
- Storage tab > Add policy
- Select the target storage channel
- Enable and save
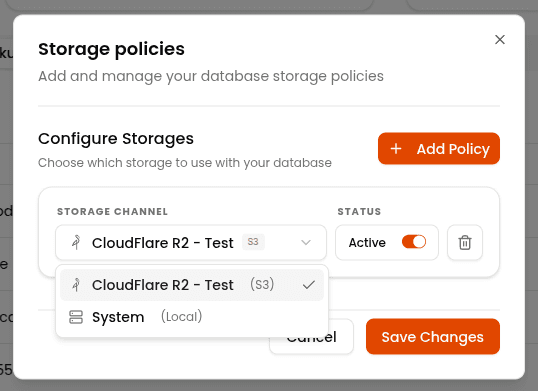
You can create multiple storage policies on the same database. The backup file will be sent simultaneously to all active destinations.
From the Backups tab, each backup shows the send status per channel:
| Status | Meaning |
|---|---|
pending | Waiting to be sent |
success | Sent (path, size and checksum verified) |
failed | Send failed for this channel |
Quick Reference
| What you're looking for | Path |
|---|---|
| Create an agent | Settings > Agents > Add agent |
| View an agent's key | Settings > Agents > [agent] > Show Key |
| Create a project | Projects > New project |
| View an agent's databases | Settings > Agents > [agent] > Databases |
| Add a database | Settings > Agents > [agent] > Add database |
| Configure backup schedule | Projects > [project] > [database] > Schedule |
| Configure retention | Projects > [project] > [database] > Schedule > Retention |
| Configure alerts | Projects > [project] > [database] > Alerts |
| Configure backup storage | Projects > [project] > [database] > Storage |
| Add a notification channel | Organisation > Notifications > Channels > Add channel |
| Add a storage channel | Organisation > Storages > Channels > Add channel |
| Notification logs | Organisation > Notifications > Logs |
| Agent health | Settings > Agents > [agent] > Health |
Last updated on